The data you use matters, especially when it comes to the weather.
Every one of those weather apps is showing you re-packaged government data coming from The National Weather Service or NOAA.
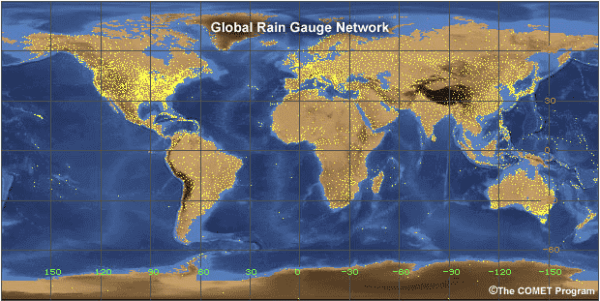
When it comes to using weather data to improve decision-making, especially in business, you want to ensure you’re feeding your applications the most robust weather data available.
In this blog, we’ll take a look at how a simple React component can display the current weather conditions for any location. Developers can integrate this component into any web application using the Tomorrow.io weather API to get quality weather data and create a react weather widget.

What Is a React Weather Widget?
A React weather widget is built using React, one of the most popular JavaScript libraries, which lets you create powerful UIs from isolated pieces of code called “components.”
A React weather widget is a customizable, interactive element that can display real-time weather data on a website. It taps into the React framework’s component-based architecture, allowing developers to encapsulate weather data fetching, processing, and displaying logic into a neat package that can be reused across different parts of an application or even across different applications.
With Tomorrow.io’s Weather API, creating a React weather widget becomes a straightforward task. Developers can request the exact weather data needed, receive it in a developer-friendly format, and then use React’s state-of-the-art features to create a dynamic, real-time weather widget. This enhances user experience by providing businesses with weather updates directly on the platform they are using.
How To Use the Tomorrow.io Weather API Data Source
Before you get started with Tomorrow.io weather API, you’ll need to sign up for an API key.
Getting an API key from Tomorrow.io is easy; just sign up and create an account. When you create an account, your personal API key will be automatically created for you to use in your application.
After signing up, you are ready to make your first API request.
The code below will request the weather data from the current location for which it receives the coordinates.
const queryString = require("query-string");
const moment = require("moment");

const fetchCurrentWeather = (coordinates) => {
  const getTimelineURL = "https://api.tomorrow.io/v4/timelines";
  const apikey = '[API_KEY]'; // Replace [API_KEY] with your actual API key
  let location = coordinates.join(",");
  const fields = ["precipitationIntensity", "windSpeed", "temperature"];
  const units = "imperial";
  const timesteps = ["current"];
  const now = moment.utc();
  const startTime = moment.utc(now).add(0, "minutes").toISOString();
  const timezone = "America/New_York";

  const getTimelineParameters = queryString.stringify({
    apikey,
    location,
    fields,
    units,
    timesteps,
    startTime,
    timezone,
  }, {
    arrayFormat: "comma"
  });

  return fetch(getTimelineURL + "?" + getTimelineParameters, {
    method: "GET"
  });
};

export default fetchCurrentWeather;
The requested data will have the following weather fields: temperature, wind speed, and precipitation intensity, and those fields will be measured using the imperial system.
The function fetchCurrentWeather is exported and then used in the React Weather Component that we will see in the following section.
Integrating Weather Data With the React Weather Component
Now that we have the request function ready, let’s look at the component that will show the weather data.
The code below will use the function fetchCurrentWeather to get the weather data when the component is loaded and will store it in its state in the field data.
import React, { useState, useEffect } from "react";
import fetchCurrentWeather from "./WeatherService";
const WeatherComponent = (props) => {
 const { location } = props;
 const [data, setData] = useState({
   timelines: [
     {
       intervals: [
         {
           values: {
             temperature: 0,
           },
         },
       ],
     },
   ],
 });
useEffect(() => {
   fetchCurrentWeather(location.coordinates)
     .then((result) => result.json())
     .then((json) => {
       setData(json.data);
     })
     .catch((error) => console.error("error: " + error));
 }, []);
const { temperature, precipitationIntensity, windSpeed } =
   data.timelines[0].intervals[0].values;
return (


{`${Math.round( temperature )}° F`} {location.label}


{`${precipitationIntensity} IN`} {`${windSpeed} MPH`}


); }; export default WeatherComponent;
The HTML structure of the component will display current weather data, including temperature, rain intensity, and wind speed for the selected location.
With the component ready, it’s just a matter of importing it into your application and using it.
Weather API Use Cases
The example above is just a simple sample of the potential benefits of using a weather API.
We can extend those benefits when we consider enhancements to the weather API, including advanced weather data layers and features, including:
- Events API — monitor and receive alerts about adverse events for a specific set of locations
- Weather Maps — Leverage map tiles to visualize weather conditions on a map and find out when, where, and how your business can be impacted so you can be prepared
- Weather On Routes — check what obstacles are being created by the weather that can put your business at risk, increase costs, or create delays
- Weather Data Layers — Integrate up to 80 data fields into your React app
After integrating the above features in the existing Weather Component, incorporating the components into another web application will be easy, and the end application will be richer.
Another possible improvement is to include a feature that provides the forecast for the coming week and automatically collects real-time data to update the component.
All of these API features are there to enhance React weather widgets and the ability to make better decisions regarding the weather.
You can learn more about Tomorrow.io’s Weather API in their API documentation.
The Impact of Weather on Global Business
Ensuring you have access to robust weather data matters because of weather’s impact on global businesses.
In fact, in 2022, weather and climate-related events cost the global economy USD $313 billion.
And we see examples of it every day.
Weather can influence consumer behavior, supply chain logistics, and energy consumption patterns, and so much more.
Retail and eCommerce: Consumer purchasing patterns can change with the weather. A forecast for a cold snap can drive up sales of heaters and winter clothing. Conversely, a sunny forecast can boost the demand for outdoor goods.
Agriculture: Farmers rely heavily on weather data for planting, harvesting, irrigation, and applying pesticides. Unpredicted weather events can devastate crops, thus impacting commodity prices globally.
Energy Sector: Energy demand forecasting depends on weather conditions, especially temperature. Utilities companies must anticipate changes to manage grid loads effectively.
Transportation: From aviation to shipping, all modes of transportation need accurate weather data to ensure safety and efficiency and minimize delays.
Insurance: Weather is a critical factor for the insurance industry, which needs to assess risk and anticipate claim volumes related to weather events.
A great example of the impact of weather on global business is the Suez Canal obstruction by the Ever Given in March 2021, which blocked one of the world’s busiest trade routes and stranded an estimated $9.6 billion worth of goods.
The root of the issue here? The weather.
Without accurate, real-time weather forecasts available to operation decision-makers, they couldn’t have known when to be proactive and take action in response to the storm.
This is where access to weather data matters most. Whether you’re seeking information on a weather map or through a weather API, with the right information, business leaders can leverage a weather forecast through a coded widget inside their logistics business applications and make it accessible to decision-makers.
Get More Out of a Weather API
Leveraging a weather API is not just about displaying basic weather information; it’s about tapping into a reservoir of data that can transform how users interact with your application.
With Tomorrow.io, you can ensure you’re accessing the most robust weather data available.
To learn more about the Tomorrow.io Weather API, check out their API documentation.