Welcome to Part 2 of our Complete Guide to Building a Weather Data Chatbot. In Part 1, we talked about how to set up the initial chatbot through IBM Watson Assistant, and creating that dialog flow. We then dived into how to set up the NodeJS server to start sending data to our chatbot to prompt the right responses. Now it’s time to get that valuable weather data, from the Tomorrow.io weather API endpoint.
3. Call Tomorrow.io Timeline Endpoint
The local node server is not publicly accessible. Therefore, we need to use ngrok to temporarily allow public connections for our webhook integration with IBM Watson. In a fresh terminal, run the command “ngrok http 3001” and copy the HTTPS URL from the terminal output for forwarding. This URL will proxy external requests to our server once we start it. Paste in the URL value and append “/tomorrow-io” onto the end in the IBM Watson Assistant dashboard.
We have to configure two more pieces of information before testing the entire flow. First, for the Timeline dialog node, specify the parameter names and values in the Then callout to my webhook section. The keys are campground with the value “$campground”, and interval with the value “$interval”. Second, scroll down to the Assistant responds section. In the Respond with box for $webhook_result_1 enter “$webhook_result_1.response”. This value pulls the response parameter from our return JSON object and passes it on to the user.
And just like that, you’ve created a barebones weather chatbot! You can embed this chatbot into your website, but let’s walk through how to put together a front-end with ReactJS that gives us more control over how the chatbot looks.
4. Build Custom Front-End
In a terminal, navigate to the parent directory our the server project. We’re going to bootstrap a React app with Create React App. However, this project must be created outside of the starting-repo-tomorrow-io-chatbot-nodejs-server folder. To create the app, open up a new terminal and run the commands below.
$ npx create-react-app chatbot-frontend
$ cd chatbot-front
$ yarn add axios
$ yarn start
The new app folder (chatbot-frontend) should now be next to our server folder. Additionally, a new browser window opens to the default app page. Do not stop the Node server process. The frontend and backend should be running at the same time. Open chatbot-frontend/package.json and add,
"proxy": "http://localhost:3001"
to the bottom of the configuration object.
 ...
   ],
   "development": [
     "last 1 chrome version",
     "last 1 firefox version",
     "last 1 safari version"
   ]
 },
 "proxy": "http://localhost:3001"
}
Save the file. This property proxies requests made on the frontend to the Node server. Now let’s create a chat interface. Open chatbot-frontend/src/App.js. First, let’s add a component and a helper timestamp function for message metadata below the import statements at the top of the file.
...
const getTimestamp = () => {
 let currentTime = new Date();
 return currentTime.toLocaleTimeString();
}

const Message = ({
 username,
 text,
 createdAt
}) => {
 return (
{username} {createdAt} {username === “ChatBot” ? // Creates possibility for cross-site-scripting attack
: {text} }
) } …
Then, in the main component, add the state variables and interaction handlers above the return statement.
...
function App() {
 // Create ref to focus user input after entering a message
 let inputRef = React.useRef(null);

 // Create ref to use in auto-scroll
 let messagesEl = React.useRef(null);

 // Set state variable with initial message on render
 let [messages, setMessages] = React.useState([
   {
     username: 'ChatBot',
     message: 'How can I help you today?',
     createdAt: getTimestamp()
   }
 ]);

 // Initialize other state variables
 let [composeInput, setComposeInput] = React.useState('');
 let [session, setSession] = React.useState('');

 // Creates session and saves new session token to state
 // session tokens are required to send messages to IBM Assistant
 const startSession = () => {
   axios.get("/watson/session")
     .then(({ data }) => {
       setSession(data.session_id)
     })
     .catch(e => console.log(e))
 }

 React.useEffect(() => {
   startSession();
 }, []);

 React.useEffect(() => {
   if (messagesEl) {
     messagesEl.current.addEventListener('DOMNodeInserted', event => {
       const { currentTarget: target } = event;
       target.scroll({ top: target.scrollHeight, behavior: 'smooth' });
     });
   }
 }, [])

 const handleSubmit = (e) => {
   // Stop page form refreshing
   e.preventDefault();

   // Append message to other messages
   setMessages(oldArray => [...oldArray, { message: composeInput, username: "User", createdAt: getTimestamp() }]);

   // Erase current input message
   setComposeInput('')

   // Send user cursor back to text input
   if (inputRef) {
     inputRef.current.focus();
   }

   // Send message off to Watson
   axios.post(
     '/watson/message',
     {
       message: composeInput,
       sessionId: session
     })
     .then(({ data }) => {
       setMessages(oldArray => [...oldArray, { message: data.response, username: "ChatBot", createdAt: getTimestamp() }]);
     })
     .catch(e => console.log(e))
 }

   return (
...
IBM’s Assistant needs a session token to keep track of different conversations it may be having at one time. So, when a new conversation starts, we call the backend to retrieve a token and store it in the state. Next, before saving the file, import React and the axios library at the top.
import logo from './logo.svg';
import './App.css';
import React from 'react'; // new
import axios from 'axios'; // new
...
Upon saving, the app should not change because we have not modified the JSX code yet.
Replace the JSX code in the component with the following,
...
{/* */}
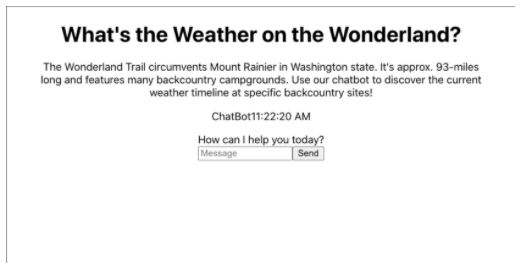
What’s the Weather on the Wonderland?
The Wonderland Trail circumvents Mount Rainier in Washington state. It’s approx. 93-miles long and features many backcountry campgrounds. Use our chatbot to discover the current weather timeline at specific backcountry sites!
…
After saving the file again, you should see new components rendering.
The chatbot looks pretty basic right now because the code is missing styles. To add styles, open up chatbot-frontend/src/index.css and paste in the classes below.
* {
 margin: 0;
 padding: 0;
 box-sizing: border-box;
}

html {
 font-size: 16px;
}

input {
 font-size: 14px;
}

body {
 line-height: 1.4;
 color: #333333;
 font-family: Helvetica, Arial, sans-serif;
}

.hero-image {
 width: 30%;
 margin: 1rem auto;
 min-width: 200px;
}

h1 {
 margin-bottom: 16px;
}

label {
 display: block;
 font-size: 14px;
 margin-bottom: 8px;
 color: #777;
}

input {
 border: 1px solid #eeeeee;
 padding: 12px;
 outline: none;
}

button {
 cursor: pointer;
 padding: 12px;
 background: #4b02e9;
 border: none;
 color: white;
 font-size: 16px;
 transition: background .3s ease;
}

button:hover {
 background: #370a98;
}

button:disabled {
 cursor: default;
 background: #3700feb3;
}

/* Join Page Styles */

.centered-form {
 background: #333744;
 width: 100vw;
 height: 100vh;
 display: flex;
 justify-content: center;
 align-items: center;
}

.centered-form__box {
 box-shadow: 0px 0px 17px 1px #1D1F26;
 background: #F7F7FA;
 padding: 24px;
 width: 250px;
}

.centered-form button {
 width: 100%;
}

.centered-form input {
 margin-bottom: 16px;
 width: 100%;
}

/* Chat Page Layout */

.chat {
 display: flex;
 height: 100vh;
}

/* Chat styles */

.chat__main {
 flex-grow: 1;
 display: flex;
 flex-direction: column;
 max-height: 100vh;
}

.chat__messages {
 flex-grow: 1;
 padding: 24px 24px 0 24px;
 overflow-y: scroll;
}

/* Message Styles */

.user-message {
 background-color: rgb(83, 83, 233);
 color: white;
}

.user-message .message__meta {
 color: rgb(245, 245, 245);
}

.bot-message {
 background-color: white;
}

.message {
 margin-bottom: 16px;
}

#messages {
 text-align: left;
}

.message-template {
 /* background-color: white; */
 padding: 8px 16px;
 margin: 8px 0px;
 border: 1px solid #CCC;
 border-radius: 5px;
 -webkit-border-radius: 5px;
 -moz-border-radius: 5px;
 -ms-border-radius: 5px;
 -o-border-radius: 5px;
}

.message__name {
 font-weight: 600;
 font-size: 14px;
 margin-right: 8px;
}

.message__meta {
 color: #777;
 font-size: 14px;
}

/* Message Composition Styles */

.compose {
 display: flex;
 flex-shrink: 0;
 margin-top: 16px;
 padding: 24px;
}

.compose form {
 display: flex;
 flex-grow: 1;
 margin-right: 16px;
}

.compose input {
 border: 1px solid #eeeeee;
 width: 100%;
 padding: 12px;
 margin: 0 16px 0 0;
 flex-grow: 1;
}

.compose button {
 font-size: 14px;
}
The new styles bring the app to life, and a user can reply to the chatbot. Unfortunately, the chatbot isn’t responding! We need to configure the backend to facilitate the conversation with our new frontend and IBM Watson. You may have noticed that the frontend makes API calls to two routes that do not exist:
/watson/message
/watson/session
We need to go back into the Node server and create these routes. Each route interacts with IBM Watson Assistant’s API, and we’ll have to set up authentication for those interactions.
Back in the routes.js file on the server, import two IBM libraries. One for authentication, one for sending requests to the IBM Assistant API.
const AssistantV2 = require('ibm-watson/assistant/v2');
const { IamAuthenticator } = require("ibm-watson/auth");
Underneath the file imports, let’s use these libraries to authenticate and connect to the external API.
// Authenticate to IBM Cloud
const authenticator = new IamAuthenticator({
   apikey: process.env.IBM_API_KEY
})

// Create IBM Watson Assistant
const assistant = new AssistantV2({
 version: '2020-04-01',
 serviceName: 'assistant',
 authenticator: authenticator,
 serviceUrl: process.env.ASSISTANT_URL
})
Next, we can add the two missing routes above the existing /tomorrow-io route.
router.get("/watson/session", async (req, res) => {
   try {
       const session = await assistant.createSession({
           assistantId: process.env.ASSISTANT_ID
       })

       res.json(session['result'])
   } catch (e) {
       res.send("Session creation not successful");
       console.log(e);
   }
});

router.post("/watson/message", async (req, res) => {
   const { message, sessionId } = req.body;

   // Construct Payload
   const payload = {
       assistantId: process.env.ASSISTANT_ID,
       sessionId,
       input: {
           message_type: "text",
           text: message
       }
   }

   try {
       // Send data to Watson Assistant
       // Access result property in response
       const { result } = await assistant.message(payload)

       // Access response text nested in object
       const response = result?.output?.generic[0]?.text || "";

       // return response
       res.json({
           response
       })
   } catch (e) {
       console.log(e)
   }
})
Final Touch
The reason we built a custom frontend in the first place was the control the weather data display. It’s difficult to control the display because data is sent from our server, through IBM, back to our server, and to the frontend.
One way that we can clean up the data display for the frontend is to return the data as HTML in string format. Then, we can insert that HTML as the chatbot’s response. This solution uses React’s dangerouslySetInnerHtml prop. Consequently, we leave the door open for cross-site-scripting attacks.
In this tutorial, user input is not used by the bot on the frontend, so the risk is mitigated. However, it would be easy to accidentally create a real hazard if the chatbot repeats any user input.
To format the timeline weather data, replace the stringInterval variable in routes.js with the following statement.
// Create a readable string for the user
       const stringInterval = intervals.map(item => {
           return `
At ${new Date(item.startTime).toLocaleTimeString()} there is a ${item.values.precipitationProbability}% chance of precipitation. Temperature of ${item.values.temperature} degrees Fahrenheit.

` }).reduce((item1, item2) => item1 + "\n" + item2)

Save the file. Then, restart the server and refresh the front end. Enter the conversation inputs from before and observe that the timeline looks much better, especially once we add an image! And there you have it – your very own custom built weather chatbot, powered by weather data from the Tomorrow.io weather API.