Everyone wants to stay ahead of the weather. That’s why weather alerts are so useful.
Unfortunately, monitoring the weather typically means you’re always looking out for adverse weather conditions. And while you definitely aren’t wishing for bad weather to happen, it’s imperative for you to know when they do—ideally ahead of time, giving you and your business ample opportunity to take appropriate actions to keep operations safe and functional.
By setting up alerts with custom weather conditions using the Tomorrow.io Weather API, you can stay connected and never miss a beat.
That’s the power of the Tomorrow.io insights rules engine, which allows you to configure any set of weather-based conditions according to your own industry use cases, and connect those forecasts and insights to dynamic webhook-based alerts. Our weather API will monitor your locations and trigger messages to the right stakeholders via our endpoint prior to, at the start of, or at the end of a weather condition that matches your rules.
Let’s walk through a step-by-step example. Let’s say we want to set up an alert that triggers for moderate snow at Pacific Central Station in Vancouver. We can expect an uptick in train ridership as people avoid walking in the snow, and want to plan and staff accordingly.
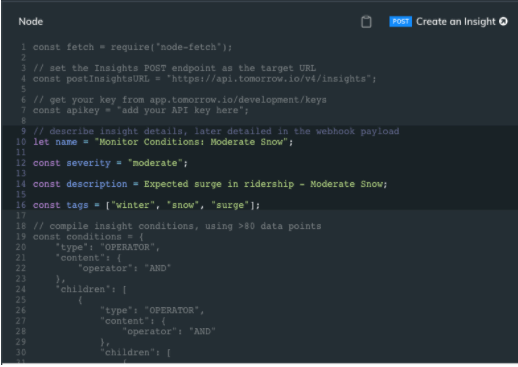
1) Create and describe insight
After grabbing your API key, you can create your insight by adding some descriptive attributes that you can pull directly from the webhook’s payload to enrich your message. The distribution service you use for the alert will not need any additional handling – our webhook will send these descriptions and tags as part of the payload.
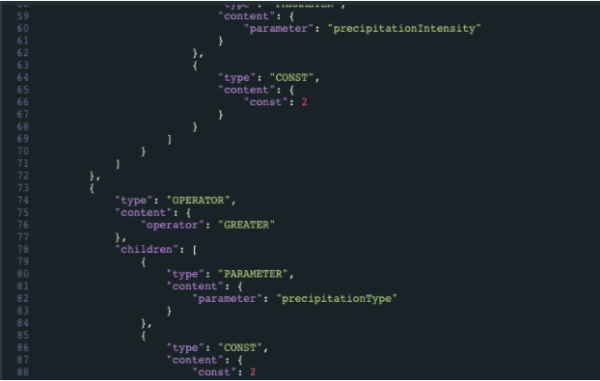
2) Set insight conditions and parameters
Next, browse through our more than 80 weather data points and use our rich syntax of operators to create your own custom rules and conditions. You know your business best, so you can pinpoint the exact weather conditions that will make a difference to your operations.
In this example, we’ll set it up so that alerts are triggered for a moderate snow event, which we will define for our own purposes as precipitationIntensity of 0-2mm and precipitationType > 2 (Snow, Freezing Rain, or Ice Pellets).
But the beauty of the Tomorrow.io API is you can set insights and alerts…for whatever threshold you want in whatever weather conditions! Maybe you have a different measure of what you consider heavy winds or light rains than others, or what exactly will impact your business.
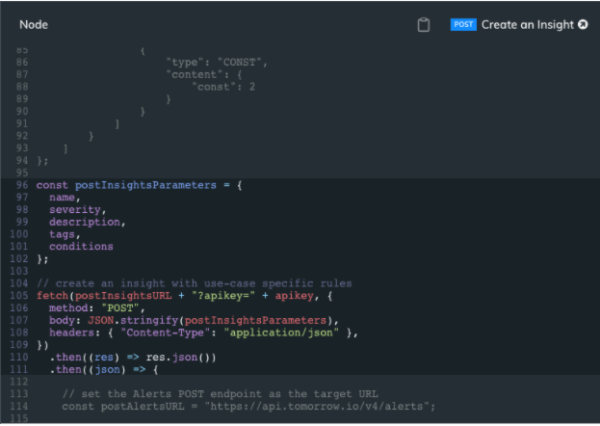
3) Create custom insight
And just like that, you’ve created your first Tomorrow.io custom insight! You can now send out the call to set the insight in your system:
4) Set up your alert details
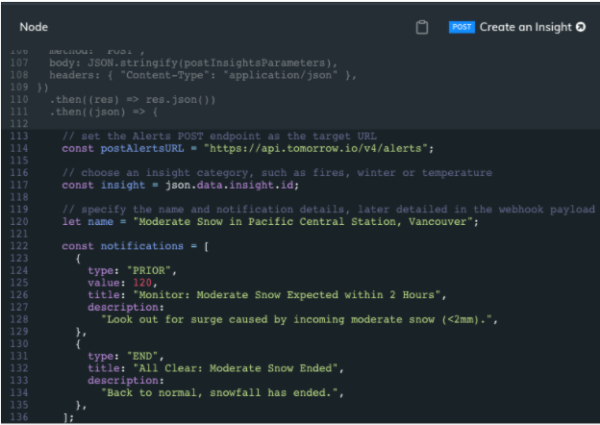
Now that you’ve set up your custom insight, it’s time to set up the right alert to pair with that insight. Alerts that are based on custom insights can be sent PRIOR/START/END of the event (or in more use cases, sent for all three) because they are calculated throughout the day.
You can also add a title and description to enrich the payload, all without any additional handling. PRIOR notifications also include an additional value attribute so you can specify exactly when before the event is forecasted to start you want the alert to be sent.
In this example below, we’ve set up the alert to first trigger 2 hours prior to when moderate snow is forecasted, giving our operations team plenty of time to make the necessary adjustments.
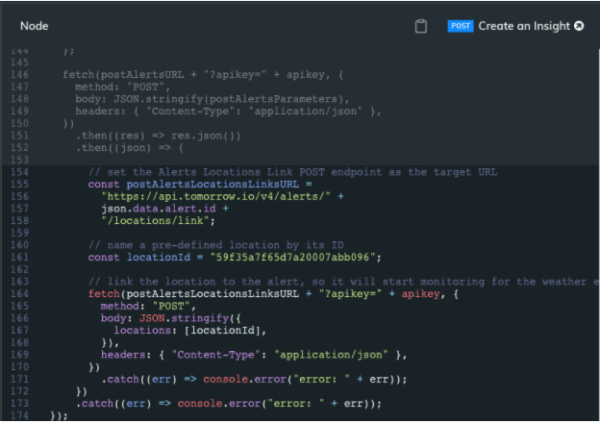
5) Create your insight-based alert
Now that all the parameters of our insight has been set, we can create the alert in the system and link it to our location of interest. Insights-based alerts can only be linked to a Point location type and must be predefined in the system. In this example, we’ve used the locationID of Vancouver’s Pacific Central Station as our location of interest for where we want the insight-based alert to trigger on.
6) Configure your webhook
Finally, it’s time to configure your webhook and connect the platform to your webhook URL so it can start listening to incoming events and parse the notification payload to distribute it to your chosen channel.
There are several ways to configure your “Alert listeners” – you can read more about these options in our in-depth guide. To get started quickly and simply, we recommend using our one-click Zapier integration, which allows you to send notifications via SMS, email, and slack without any additional coding.
And that’s it! In just a few simple steps you’ve created a custom insight based on your specific weather parameters and connected it to an insights-based alert via webhook to the notification system of your choice. And just like that, you’ve gone well beyond just a simple weather forecast to a powerful weather insights engine, powered by our weather API.
Get access to the weather API today and start your weather project for free!