In this blog:
- Tomorrow.io’s Weather API makes it easy to create a weather widget for Raspberry Pi using Python
- The process to create a weather widget for Raspberry Pi includes:
- Using GUIs in Python (which are lightweight and easy to build)
- Sending a request every 80 seconds to get the weather data at regular intervals
- Using the guizero module to can pass your own data through and reflect the current weather values
- Customizing the widget to your liking
Have you ever wanted to build your own weather widget to display real-time data from the comfort of your own desk?
Harnessing the power of Raspberry Pi and utilizing a simple weather API from Tomorrow.io, you can quickly create a personalized tool that not only looks good but also provides valuable information for creating updated weather forecasts that inform your daily activities and operations.
In this article, we will provide an introduction to Raspberry Pi, outline how to set things up, how to get started with acquiring the necessary weather data you need, and how to integrate things into a cohesive weather widget.
Introduction to Raspberry Pi Weather Widget
Development boards have experienced significant advancements in recent years, transforming into powerful devices that can function as compact personal computers. One prime example of this evolution is the Raspberry Pi, a versatile single-board computer that has garnered immense popularity among hobbyists, educators, and developers.
Initially designed to promote computer science education, the Raspberry Pi has evolved into a multipurpose platform capable of handling tasks such as web browsing, document editing, and weather forecasting when used to create a weather widget.
The Raspberry Pi’s affordability, low power consumption, and extensive community support make it a great option for a wide range of projects, from simple automation tasks to complex robotics and IoT applications.
What Is a GUI Raspberry Pi Weather Widget?
A Raspberry Pi weather widget is a small application designed for the single-board computer platform, which allows users to display essential meteorological data such as temperature, humidity, and precipitation on various devices including monitors or e-ink displays. Combining raspberry pi display weather capabilities with efficient coding techniques in Python ensures smooth performance without compromising aesthetics.
What sets this project apart from pre-built solutions is its modularity and customizability. You have complete control over the widget’s appearance, sizing, and functionality through open-source software components – catering it specifically to your needs.
If you’re looking for a step-by-step guide on how to build a weather widget with Raspberry Pi, you’ve come to the right place.
We’ll outline setting up Raspberry Pi, how to get started with acquiring the necessary weather data, and how to integrate.
Building a Raspberry Pi Weather Widget with a Weather API
In order for us to bring this Raspberry Pi weather radar display project to life, we’ll need some crucial components and follow these general steps:
- Gathering necessary materials (hardware & API)
- Setting up the Raspberry Pi
- Retrieving weather data
- Configuring desktop shortcut settings
- Assembling the final product
What You Need to Build the Weather Widget
Creating a Raspberry Pi weather widget involves gathering a few essential components. By assembling these elements properly, you’ll enjoy smooth access to accurate meteorological data right on your desktop. In this section, I will walk you through a concise list of components that are crucial for building an impeccable Raspberry Pi weather widget.
1. Raspberry Pi
First and foremost, you need a Raspberry Pi board. This compact device serves as the foundation for your project. Any version of the Raspberry Pi can be used to create the weather widget; however, I recommend opting for one of the latest models such as the Raspberry Pi 4 or Raspberry Pi Zero 2W for enhanced performance.
2. Micro SD Card
A micro SD card is necessary to store the operating system and Python scripts required for running your weather widget application. A storage capacity of at least 8GB is recommended to have ample space for storing additional files and future software updates.
3. Power Supply
To keep your Raspberry Pi up-and-running, it’s vital to have a reliable power supply with an appropriate voltage rating (5V for most models). You can choose between an official Raspberry Pi USB-C power supply or any compatible aftermarket option.
4. Display Monitor
This component allows you to view the information from your weather pages directly on screen. While it’s possible to use any HDMI-compatible monitor, selecting one with touchscreen capabilities will make interacting with your weather widget even more effortless.
5. Keyboard & Mouse Combo
Though optional, investing in a keyboard and mouse combo proves beneficial during both setup and continuous use of your Raspberry Pi weather widget interface—especially if you’re using multiple applications side by side.
6. Cables and Connectors
Connectivity cables are imperative when constructing any electronic gadget, so don’t forget them! For this specific endeavor, you’ll primarily require:
- HDMI cable (to link the Raspberry Pi to a display monitor)
- USB cables/extenders (for peripherals like a keyboard and mouse)
By gathering all these components, you’ll be one step closer to building your custom Raspberry Pi weather widget. The next section will guide you on setting up the Raspberry Pi before moving on to retrieving data from an Tomorrow.io’s API and creating a desktop shortcut for easy access. Armed with this knowledge and the appropriate equipment, you are well-prepared to embark upon constructing an innovative, informative weather widget of your own design!

Setting Up the Raspberry Pi
Before diving into creating a weather widget, it’s essential to properly set up your Raspberry Pi. This will ensure that your device is ready to handle the task of displaying real-time weather data on your screen. In this section, I will guide you through the process of setting up a new Raspberry Pi or updating an existing one so that it can run our desired Raspberry Pi weather widget.
Preparing the SD Card and Installing Raspbian OS
First things first – you’ll need a compatible micro SD card (preferably 8GB or larger) for your Raspberry Pi to store the operating system and other necessary files.
- Format the SD card using a tool such as SD Memory Card Formatter.
- Download Raspberry Pi OS Lite (formerly known as Raspbian) from the official website.
- Extract the downloaded file and use an image writing tool like Balena Etcher to flash your formatted microSD card with Raspberry Pi OS Lite.
- Safely eject the microSD card once completed.
Booting Up and Configuring Your Raspberry Pi
Now that we have prepared our micro SD card, we’re ready to turn on our Raspberry Pi:
- Insert the microSD card into your Raspberry Pi.
- Connect peripherals such as a keyboard, mouse, and monitor via HDMI to your device.
- Lastly, power up your Raspberry Pi by attaching it to a proper power source.
Once booted-up, make sure you complete these steps:
- Update software packages by running sudo apt-get update followed by sudo apt-get upgrade in the terminal.
- Configure basic settings like language/locale, wireless LAN setup, and enable SSH using sudo raspi-config.
Installing Dependencies and Required Packages
Our Raspberry Pi weather widget will be powered by Python and fed data from Tomorrow.io’s weather API, so we need to start by installing the necessary packages. Run the following commands in the terminal to install tkinter (a Python module for creating graphical user interfaces), requests (an HTTP library for sending API calls), and PIL (a Python Imaging Library).
sudo apt-get install python3-tk python3-pil python3-requestsAfter the successful execution of these commands, your Raspberry Pi should have all the required packages installed for building your weather widget.
In conclusion, setting up the Raspberry Pi involves preparing an SD card with the latest operating system, configuring essential settings on the first boot, connecting peripherals, and installing necessary Python packages. With these measures completed, you are now ready to move forward with gathering data from Tomorrow.io’s Weather API and developing your custom Raspberry Pi weather widget.
Gathering Data from Tomorrow.io API
In order to display accurate weather data on your Raspberry Pi weather widget, you will need access to reliable and real-time information. This is where the Tomorrow.io Weather API comes into play. By using the Tomorrow.io Weather API, you can the world’s most accurate current weather conditions as well as forecast data for thousands of cities across the globe.
To get started, you’ll need to ensure you have a weather API key from Tomorrow.io. With your personal weather API key, you’ll be able to retrieve accurate, hyperlocal weather data for your Raspberry Pi weather widget.
Getting your weather API is easy to do! Follow these steps:
- Create Tomorrow’s Account in order to get your free weather API key.
- Tell us what kind of project you’re doing: After you sign up for an account, a screen will prompt you to share what kind of project using the API for.
- Get your API key: Once you have created an account, you will automatically get your free weather API key right in the Tomorrow.io platform. Simply click on the “Development” icon in the navigation, then reveal your key.

We recommend you read our weather API documentation that explains more about our API and where you can find sample code to get started.
Once you’ve grabbed your API key from the Tomorrow.io Weather API, it’s time to get coding and get the weather data we want—temperature and humidity measured each minute in metric values—with the help of Python.
Start by placing the following code in a new .py file. You can name it: “weather_widget.py”
import requests

import threading, time

from string import Template
In this project, we will require the packages above to facilitate weather data acquisition. These packages will enable us to send a request at regular intervals of 80 seconds, to obtain the latest weather information.
Our first step is to create a function that can effectively make this request and retrieve the most up-to-date weather forecast data.
def get_weather_data(lat,lon,apiKey):
URL = Template('https://data.tomorrow.io/v4/timelines?location=$lat,$lon&apikey=$apiKey&fields=temperature&fields=humidity×teps=1m')
r = requests.get(url = URL.substitute(lat=lat,lon=lon,apiKey=apiKey))
data = r.json()
return data['data']['timelines'][0]['intervals'][0]This function fetches weather data for a specified location (latitude and longitude) and returns the first interval of the first timeline, which should contain the current weather data (temperature and humidity) for that location.
If we call this function and enter the (latitude, longitude,) and our API key,
print(get_weather_data(45.6427,25.5887,’your_api_key’)), then we should see the following output:
{‘startTime’: ‘2021-03-06T08:31:00Z’, ‘values’: {‘temperature’: -1.66, ‘humidity’: 84.62}}Obtaining accurate weather data is crucial for this project, and to ensure the widget stays updated, we need to retrieve this information at consistent intervals.
As a result, we’ll need to continuously run this function to maintain accurate weather data on the widget.
To do this, we need to update our code with the following snippet:
def update_every_n_seconds(n=80):

    while True:
        weather_data = get_weather_data(45.6427,25.5887,'your_api_key')

        time.sleep(n)

thread = threading.Thread(target=update_every_n_seconds, daemon=True)
thread.start()
Here, you can pass your own data through the function get_weather_data.
Part II – The Widget
To create a widget we will use the guizero module. Guizero is designed to allow new learners, and anyone who needs a starter’s recap to quickly and easily create GUIs for their programs. In this case a GUI weather widget for Raspberry Pi with a weather API.
To get started with guizero you’ll need to install it. Installing it is as easy as downloading and unzipping a file—no special permissions or administrator rights are required.
To install it you can use the pip command: pip install guizero. Once installed, update the imports at the top with the following code:
app =App(title="Weather Widget", width=400, height=100)
temperature_msg = Text(app, text="")
humidity_msg = Text(app, text="")
These lines will create a new widget weather application with the title “Weather Widget” and will declare 2 text placeholders in which we will show the temperature and the humidity.
Lastly, to show this widget at the very end of our file, call the display() method.
app.display()If we run our program now from the terminal using the command: python weather_widget.py
we should see something like this:
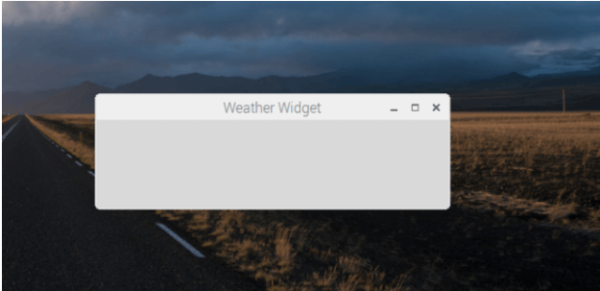
You can see that we only have the title, the content section is blank. That’s because the variables declared above are currently in an empty string. Within the update_every_n_seconds function, we need to update their values to reflect the current weather values.
For this, we need to update the update_every_n_seconds function with the following code snippet:
 def update_every_n_seconds(n=80):
    while True:
        weather_data = get_weather_data(45.6427,25.5887,'your_api_key')

        temperature_msg.value = "Temperature: " + str(weather_data['values']['temperature']) + '   °C'
        humidity_msg.value = 'Humidity: ' + str(weather_data['values']['humidity']) + '%'

        time.sleep(n)
In this section of our weather widget project with Raspberry Pi, we will create a function called update_every_n_seconds that continuously updates the weather data at regular intervals.
By default, our function will update the data every 80 seconds, but this interval can be customized by providing a different value for the n parameter. Inside the function, we use an infinite loop to call the get_weather_data function, passing in the latitude, longitude, and API key to retrieve the current weather data.
We then update the temperature and humidity messages with the latest values extracted from the weather data, converting them into strings with appropriate units (‘°C’ for temperature and ‘%’ for humidity).
Finally, we pause the loop for n seconds before proceeding to the next iteration, ensuring that our widget remains updated with the latest weather information at our desired interval.
Using the above code and knowing how this will change the weather application, if we run our program again now we should be able to see the temperature and humidity displayed as weather data in the weather application.

Diving into Raspberry Pi and GUIs is a breeze when you have the right tools to get accurate weather updates for your weather widget. With endless customization options for your weather widget, you can incorporate images and leverage the fact that the Tomorrow.io API provides a weather code. Utilize this code to determine the best image to preview based on current weather conditions for your selected zip code. Raspberry Pi offers a versatile platform for creating the most innovative projects, making it an ideal choice for enthusiasts and developers alike who want to create weather apps.
Integrating the Raspberry Pi Weather Display
To create an engaging Raspberry Pi clock and weather display, consider using a popular Python library like Tkinter or PyQt for creating graphical user interfaces. Here, you can create customizable fonts, colors or even use icons and images representing different weather conditions. Additionally, you can utilize cron jobs (for UNIX-based systems), Scheduled Task (in Windows environment), or libraries like schedule in Python to update the widget periodically with current weather details.
With all these elements combined, you have successfully built a Raspberry Pi Weather Widget that retrieves real-time data from the Tomorrow.io weather API while providing a visually appealing representation of the extracted information. Now you can monitor local weather conveniently on your device!
Conclusion
As we reach the end of this guide, I hope you have gained valuable insights on creating a Raspberry Pi weather widget using Tomorrow.io’s Weather API. Mastering these skills not only allows you to access real-time weather information conveniently but also serves as an excellent foundation for further exploring the diverse capabilities of Raspberry Pi applications.
If you’re interested in learning more about Tomorrow.io’s weather API, check out our extensive documentation or schedule a demo.
Happy tinkering!